This guide aims to help new HubSpot users set up and manage memberships on their websites. Following the steps outlined, users can create exclusive content for members, personalise their experiences, and ensure secure access control.
Prerequisites:
Basic understanding of HubSpot CMS.
HubSpot Hubs Required:
Service Hub: Professional, Enterprise
Content Hub: Professional, Enterprise
This guide will provide a step-by-step process, including screenshots and videos, to ensure a seamless setup experience for HubSpot memberships.
Step 1: Building your HubSpot Membership pages
When designing your membership site, it's crucial to consider the necessary pages and types of content that will engage your members and provide a seamless experience. Here’s a detailed look at what you need to plan:
Essential Pages
Login Page:
Purpose: Secure entry point for members to access gated content.
Key Elements: User-friendly login form, forgot password link, and a call to action for new users to sign up if they don't have an account.
Example: A clean, straightforward page with fields for email and password
Onboarding Page:
Purpose: Introduce new members to the site, highlighting key features and benefits.
Key Elements: Welcome message, site tour, and an overview of available resources.
Example: A step-by-step guide with visuals or a video tour to make new members feel welcome and informed.
Post-Signup Page:
Purpose: The first page members see after signing up, guiding them on what to do next.
Key Elements: Confirmation message, next steps, and links to key sections like the dashboard or profile page.
Example: A thank-you message with a checklist of actions for new members to complete.
Dashboard/Home Page:
Purpose: A central hub where members can access all their content and tools.
Key Elements: Overview of available content, personalised recommendations, and quick links to frequently accessed features.
Example: A dashboard that shows the latest content, upcoming events, and personalised notifications.
Profile Page:
Purpose: Allow members to update their personal information and manage their account settings.
Key Elements: Editable fields for personal details, subscription preferences, and password management.
Example: A form where users can update their contact information, change their password, and set preferences for email notifications.
Content Pages:
Purpose: Specific pages dedicated to different types of gated content.
Key Elements: Organized layout, clear calls to action, and easy navigation to related content.
Example: Separate sections for podcasts, blogs, videos, and downloads, each with its own design and navigation structure.
Content Types
Podcasts:
Purpose: Provide audio content that members can listen to on-site.
Key Elements: Embedded audio player, episode descriptions, and downloadable links.
Example: A page with a playlist of episodes, each with a play button and options to download or share.
Blogs:
Purpose: Share exclusive articles and insights with members.
Key Elements: Blog posts, categories, tags, and a search function.
Example: A blog section with featured posts, recent articles.
Download Areas:
Purpose: Provide members with access to exclusive resources such as eBooks, templates, and guides.
Key Elements: Organised file lists, download buttons, and descriptions.
Example: A resource library with categories for different types of downloads and detailed descriptions for each file.
Videos:
Purpose: Offer educational or entertaining video content exclusive to members.
Key Elements: Embedded video player, video descriptions, and related video suggestions.
Example: A video gallery with thumbnails, play buttons, and a brief description of each video.
Webinars:
Purpose: Host live or recorded webinars for members.
Key Elements: Registration forms for live events, replay links, and interaction tools like Q&A.
Example: A webinar page with upcoming event details, registration links, and access to past webinar recordings.
Considerations
User Experience: Ensure the navigation is intuitive and the design is consistent across all pages to provide a seamless experience.
Content Organisation: Categorise content effectively so members can easily find what they need. Use tags, categories, and search functionalities.
Personalisation: Use dynamic content to tailor the experience based on member preferences and behaviour, making each interaction feel relevant and valuable.
URL Structures for Membership Areas
A clear and organised URL structure is crucial when setting up membership areas on your HubSpot site. This enhances navigation and user experience. Here are some best practices tailored to a logical hierarchy:
Main URL:
yourdomain.com
Dashboard or Members Area:
yourdomain.com/portal
Courses Section:
Course Home Page: yourdomain.com/portal/courses
Specific Course Page: yourdomain.com/portal/courses/coursename
Additional Sections:
Profile: yourdomain.com/portal/profile
Podcasts: yourdomain.com/portal/podcasts
Videos: yourdomain.com/portal/videos
Downloads: yourdomain.com/portal/downloads
Support: yourdomain.com/portal/support
Using this structured approach ensures a seamless experience for members and helps maintain organized content within your membership site.
Theme options:
Choosing the right theme for your membership site is crucial for creating a seamless and engaging experience for your members. Among the available themes in the HubSpot Marketplace, one stands out for its comprehensive features and ease of use: Nexus Portal by DigiKat.
Nexus Portal: The Ultimate HubSpot Theme for Membership and Gated Content
Overview
Nexus Portal is a versatile HubSpot theme designed specifically for creating dynamic membership areas and gated content. It is ideal for a variety of industries, including Yoga, Fitness, and Business Coaching, offering a range of pre-built pages and advanced features to enhance your digital presence.
Expansive Use Cases (Examples)
E-Learning Platforms: Offer structured courses, quizzes, and certification programs.
Exclusive Communities: Create forums and discussion boards for niche interests.
Professional Networking: Develop a space for industry professionals to share resources and network.
Health and Wellness: Provide access to guided meditations, workout plans, and wellness articles.
Financial Services: Offer premium financial advice, market analysis, and investment tips.
Cooking and Recipes: Share exclusive recipes, cooking classes, and meal planning guides.
Tech and Gadgets: Provide early access to product reviews, tech tutorials, and insider news.
Real Estate: Offer members-only property listings, market insights, and virtual tours.
Travel and Lifestyle: Share travel guides, exclusive deals, and insider tips.
Art and Creativity: Provide access to online workshops, tutorials, and creative resources.
Robust Content Capabilities
Ebooks and PDF Guides: Share in-depth knowledge and resources.
Online Courses: Offer structured learning paths.
Videos: Engage members with visual content.
Templates and Stock Photos: Provide practical tools and high-quality visuals.
Social Media Posts: Deliver ready-to-use content for various platforms.
Advanced Features
Nexus Portal includes user-friendly design options, requiring no coding skills. Features such as responsive layouts, animated scroll effects, drag-and-drop customization, and support for multiple languages make it accessible and versatile. It also includes templates for blogs, landing pages, and other key sections, ensuring a professional and engaging online presence.
Step 2: Set up the registration and sign-in experiences.
Setting up the registration and sign-in experiences for your membership site is a crucial step in ensuring a seamless and secure process for your members. This section will guide you through configuring these essential features, allowing you to manage member access efficiently and provide a smooth user experience.
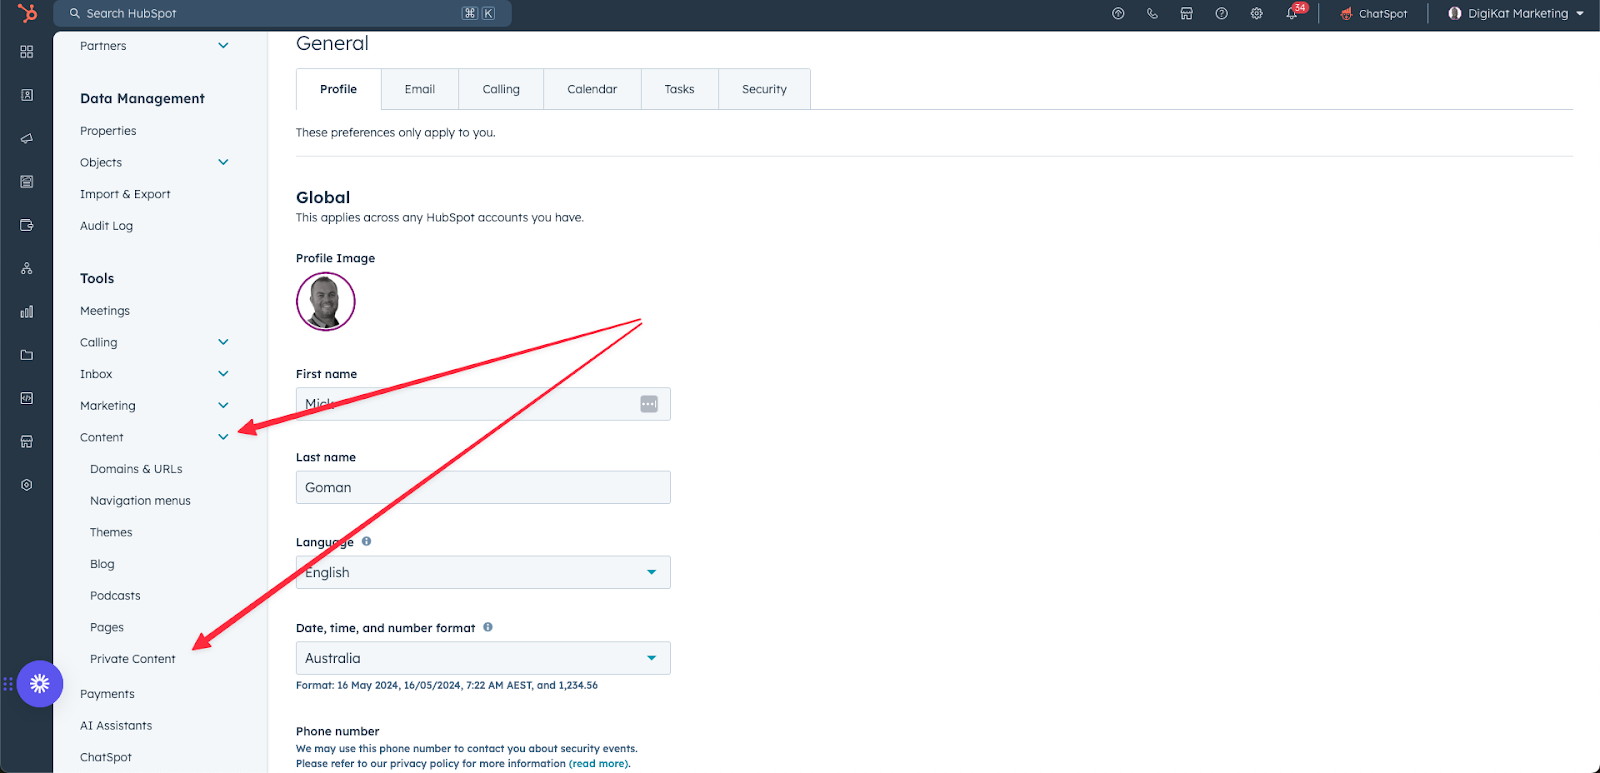
Click on settings

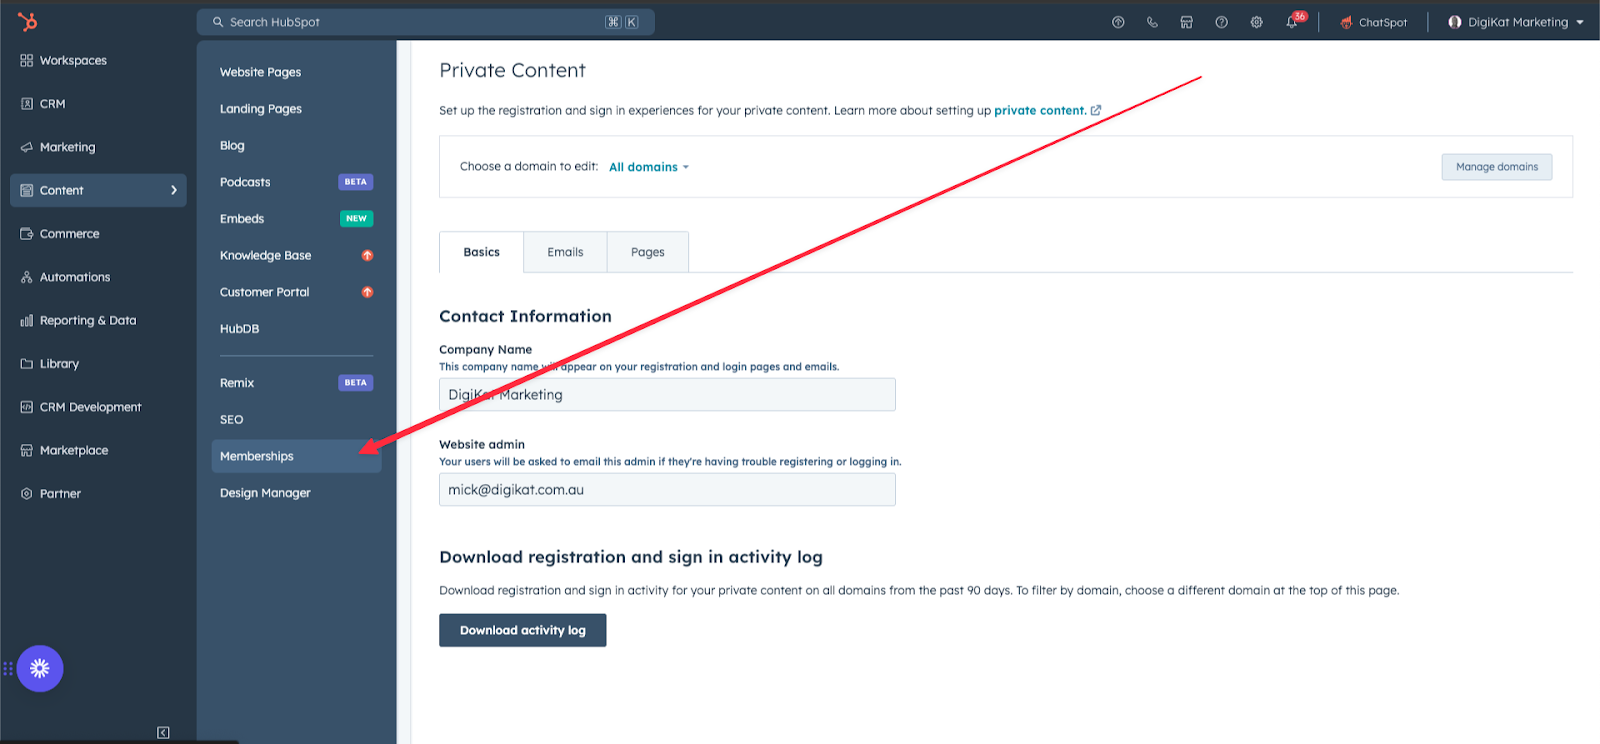
Once in settings, scroll down to “Content”, then click “Private Content.”
If you have multiple domains connected at the top of the page, select the domain you want to use for your membership area.

Basic
Once you have selected the domain, you have three option tabs at the top: Basic, Emails, and Pages.

We will start with the Basic Tab:
Inside the basic tab, you will find a section where you can enter the site admin's contact email. This is the email people can use if they need support and cannot log in.
The name of your membership area is usually the name of the business.
For advanced membership sign-up options, consider using single sign-on (SSO). SSO allows you to manage registration and login processes through a third-party identity provider like Okta.
As you scroll down, you will find more features related to self-registration and automatic logout.
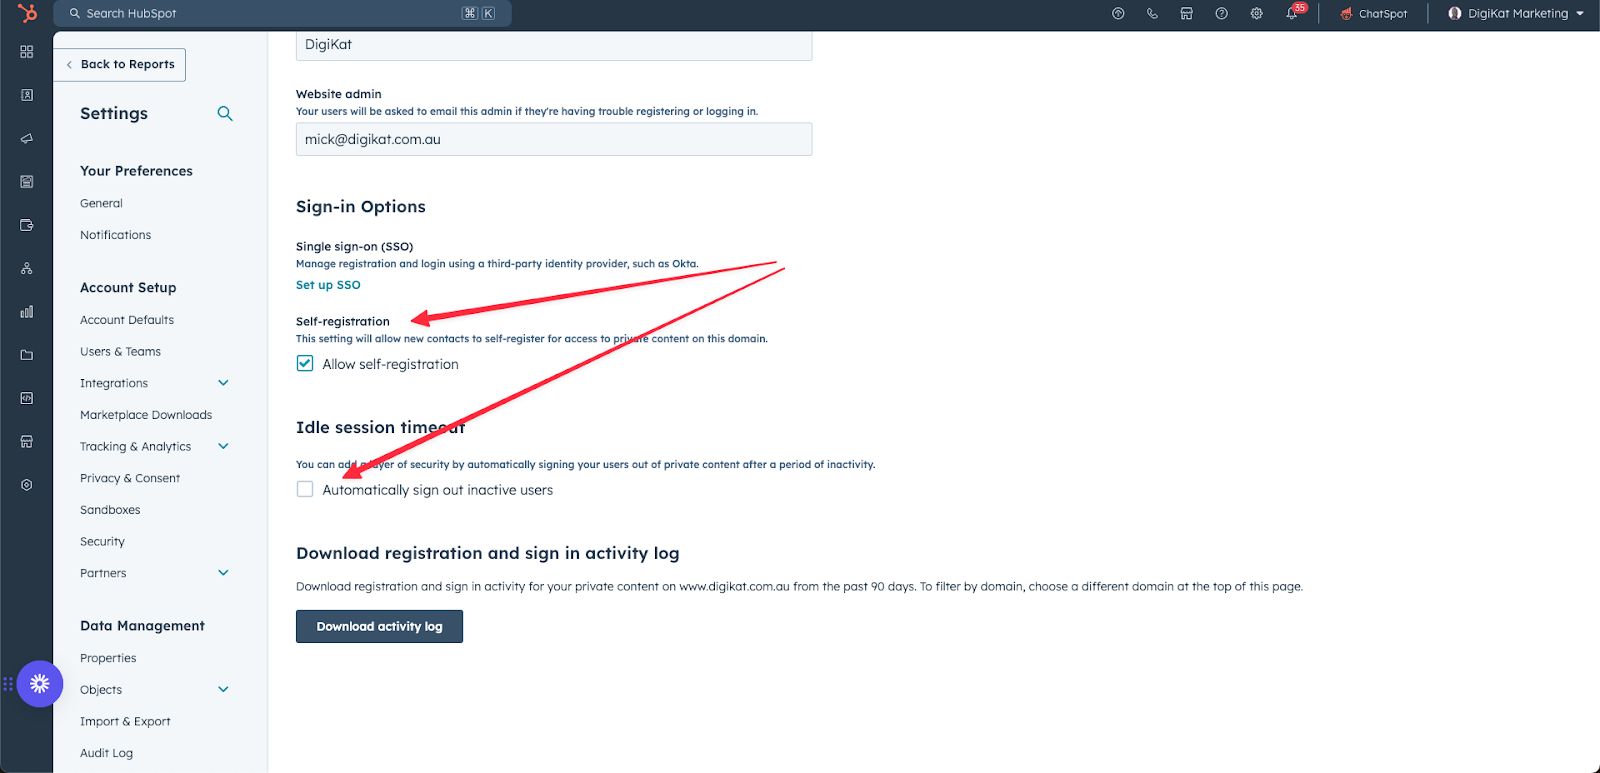
Self-Registration: This setting will allow new contacts to self-register for access to private content on this domain. With this configuration in place, anyone can self-register for access to private content on this domain. This way, they can sign up and gain instant access without requiring manual intervention.
Idle session timeout: You can add a layer of security by automatically signing your users out of private content after a period of inactivity.
Sign Out on Inactivity: Increase security by automatically logging inactive users out of sensitive content after a set period of inactivity.
Download registration and sign-in activity for your private content from the past 90 days.
To filter by domain, choose a different domain at the top of this page.
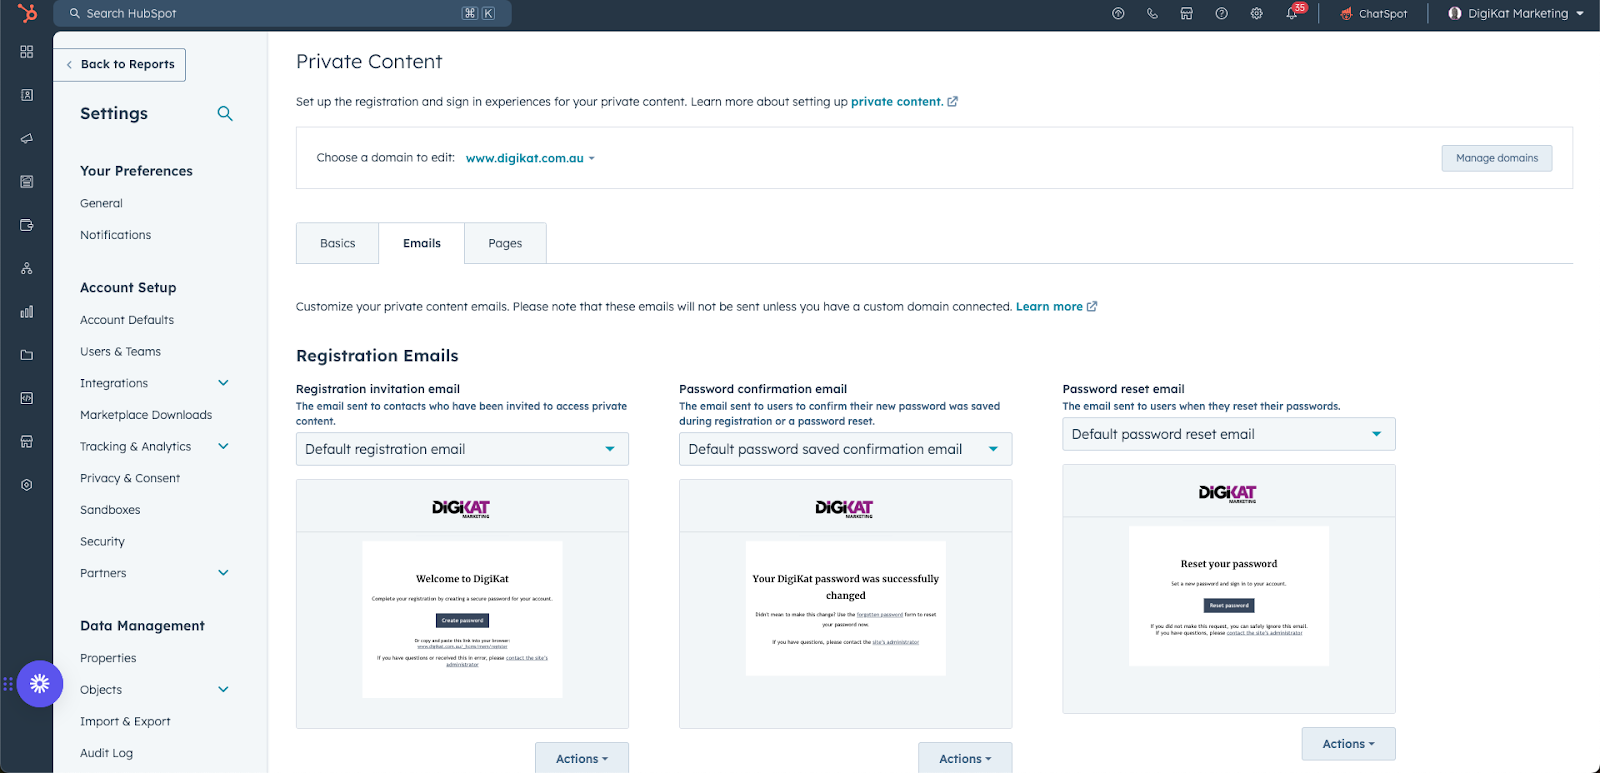
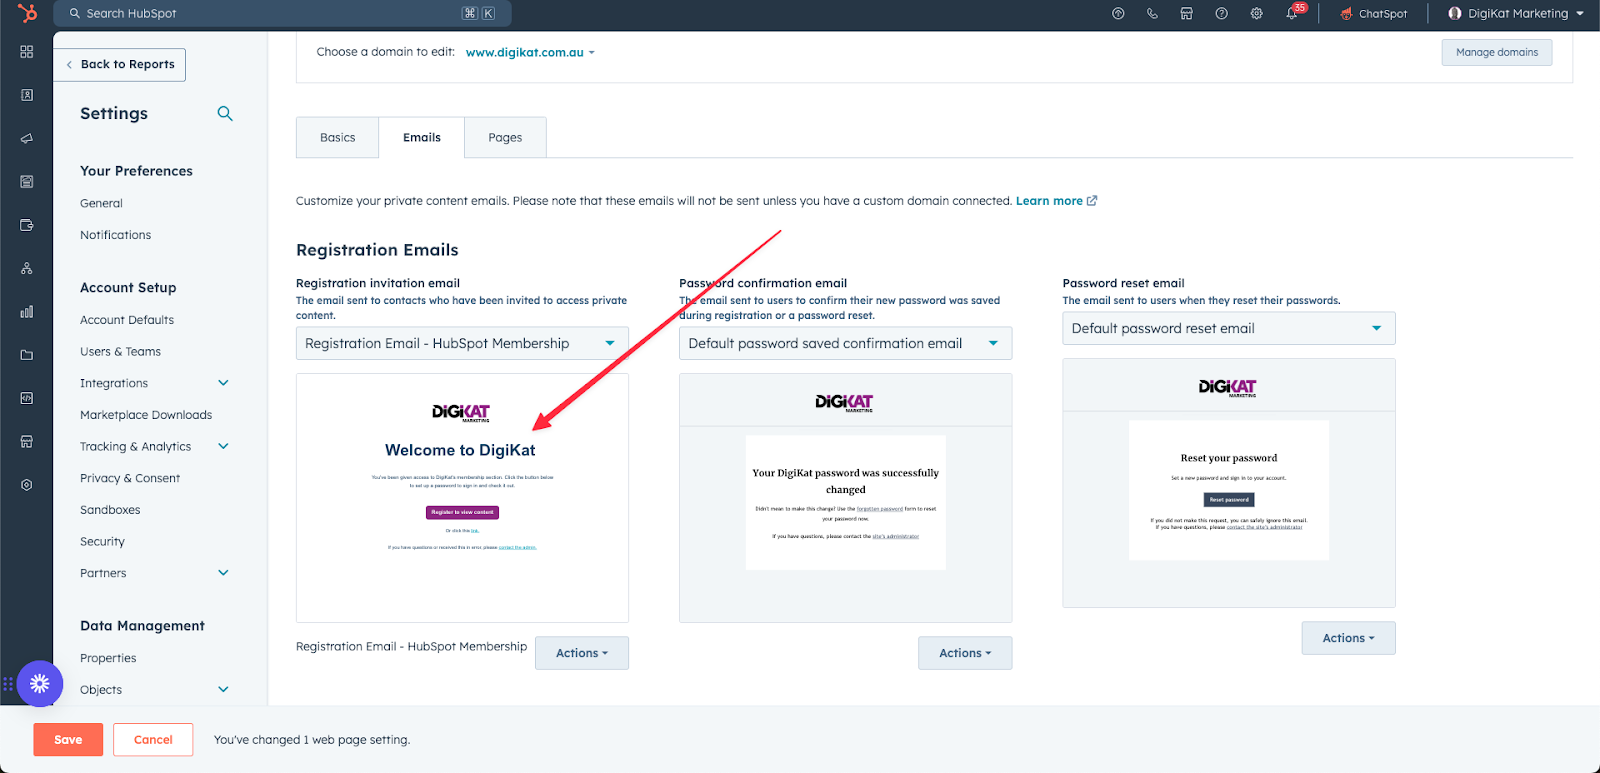
Emails
Next step: open the email tab. Here, you can customise your private content emails. Please note that these emails will not be sent unless you have a custom domain connected.
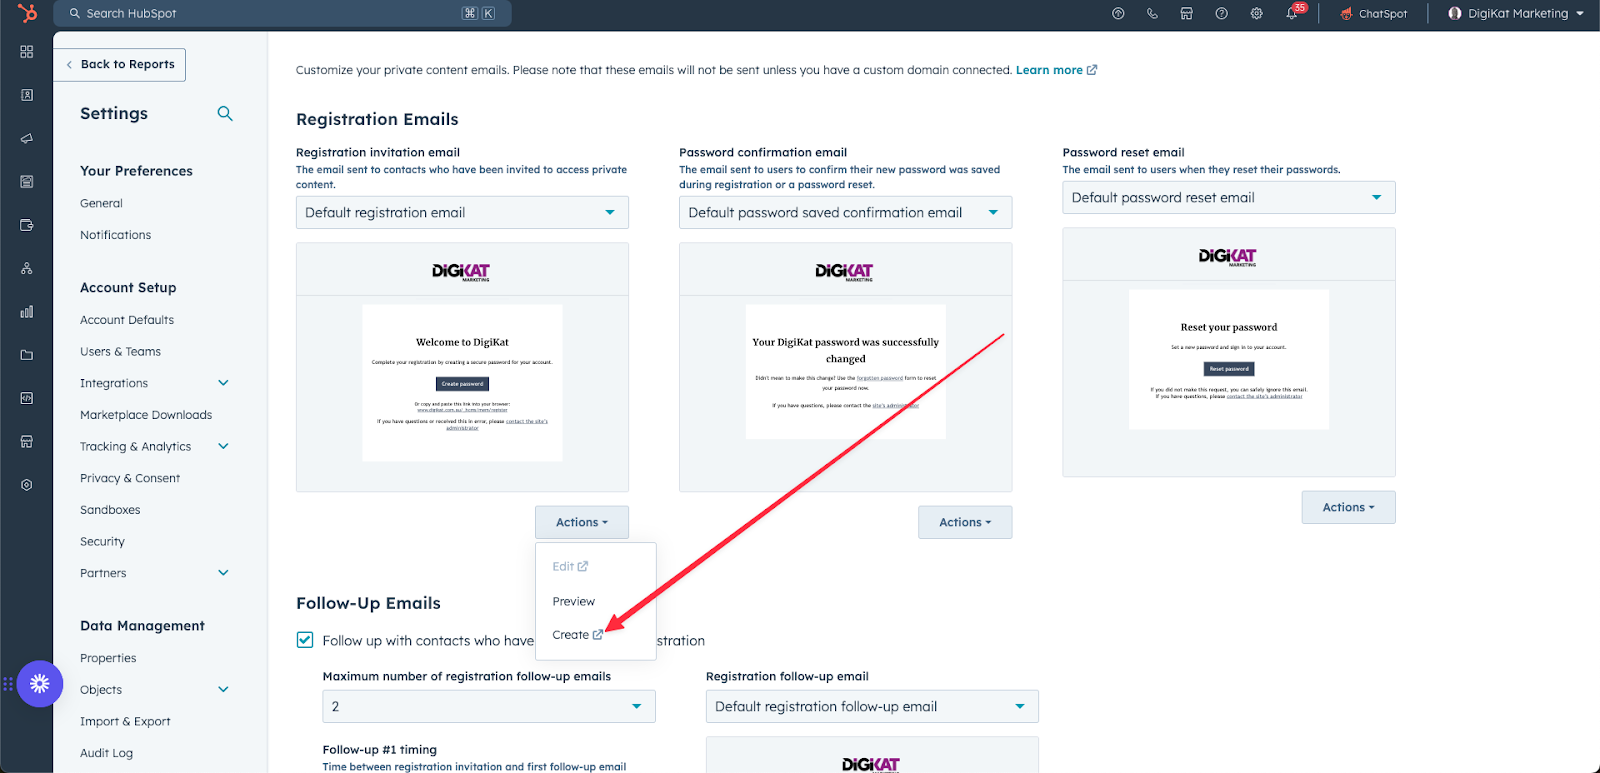
To create your own branded emails, click action and click create.
HubSpot Membership Registration Emails:
- Invite Email:
- Purpose: Invite contacts to access private content, such as gated content or exclusive webinars.
- Content:
- A warm and personalised greeting, addressing the contact by name.
- A brief explanation of the private content and why it's valuable.
- A clear call to action, such as a button or link to accept the invitation.
- Password Confirmation Email:
- Purpose: To confirm that a user's new password has been saved during registration or a password reset.
- Content:
- A friendly greeting, such as "Hi user's name."
- Confirmation that the new password has been saved successfully.
- A reminder to keep the password secure.
- A link to the login page, if applicable.
- Password Reset Email:
- Purpose: To provide a link to reset a forgotten or expired password.
- Content:
- A clear and concise subject line, such as "Reset Your HubSpot Password."
- A brief explanation of why the password reset email was sent.
- A link to the password reset page.
- Instructions on how to reset the password.
- A note indicating that the password reset link expires after a certain period.
Additional Considerations:
- Personalisation: Make sure to personalise each email with the recipient's name and other relevant information.
- Design: Use a clean and professional design that's consistent with your brand's identity.
- Mobile Optimisation: Ensure that your emails are mobile-friendly and easy to read on smartphones and tablets.
- Testing: Test your emails thoroughly to ensure they display correctly and all links work properly.
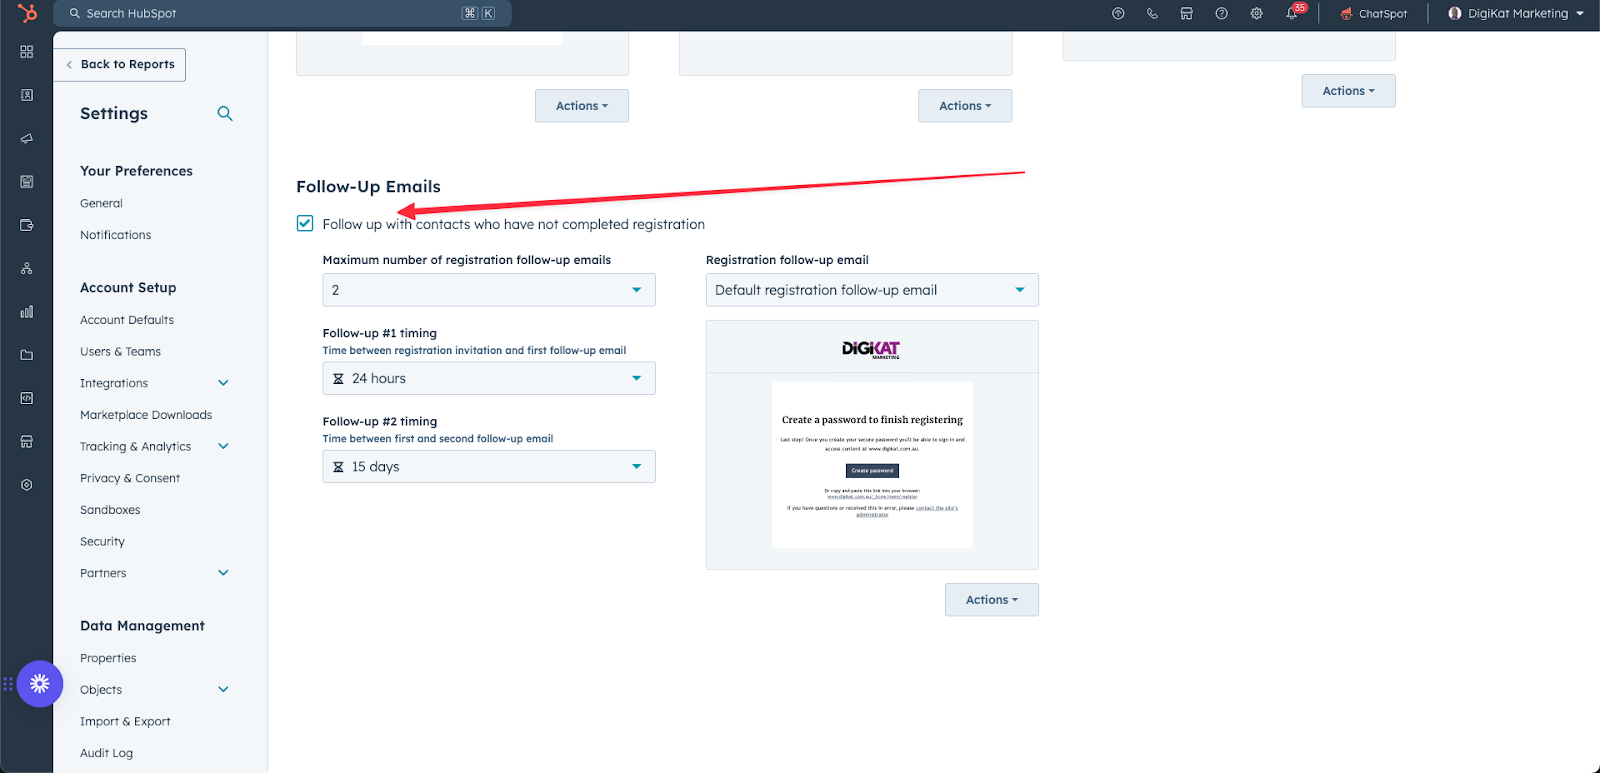
Once you have your custom emails created, turn on Follow-Up Emails
This will allow you to send follow-up emails to contacts that have not signed up yet.
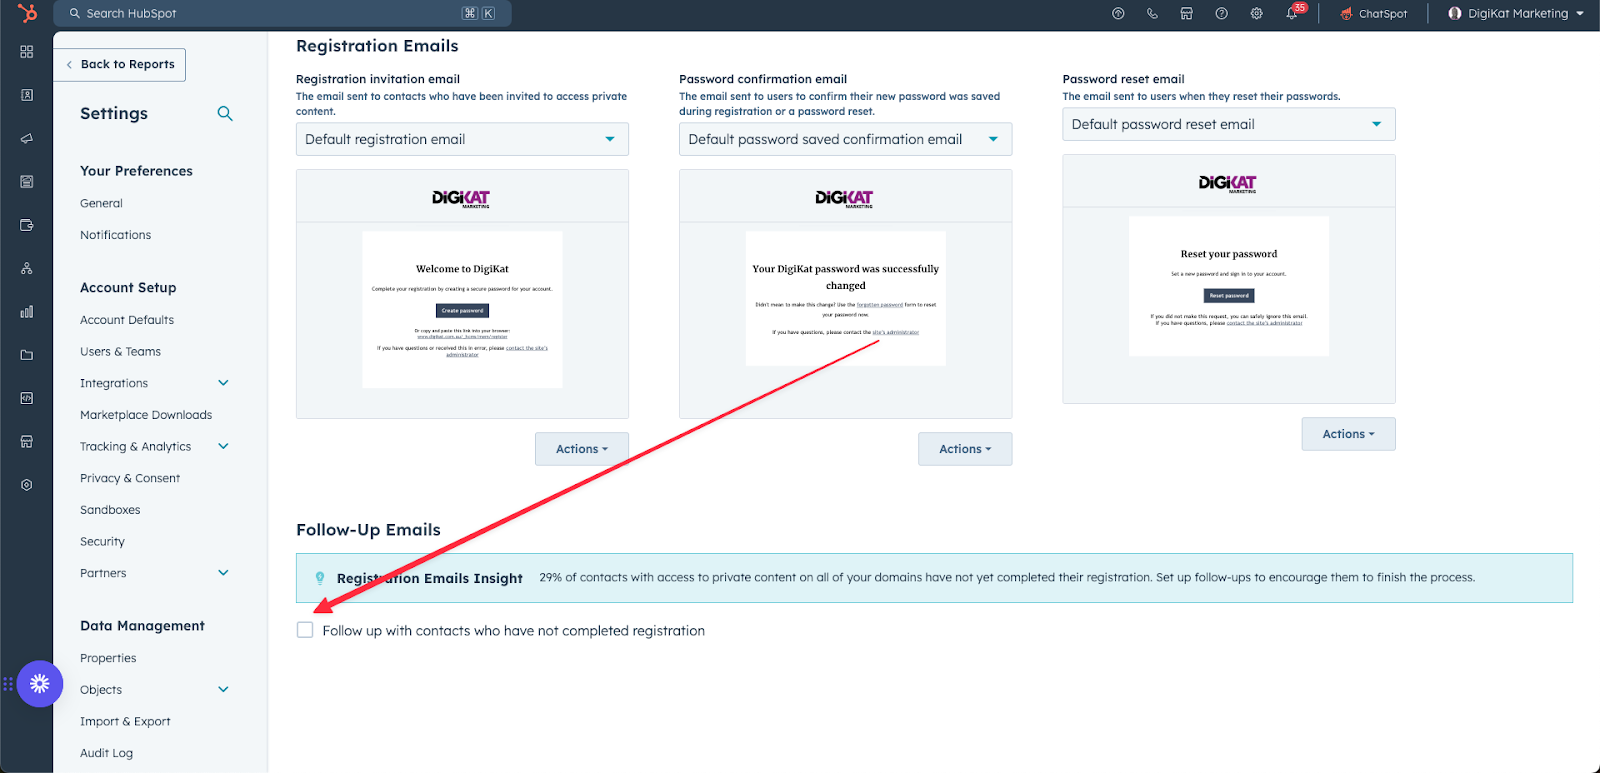
Adjust the setting to your required needs. We recommend sending 3 follow-up emails spaced over a 15-day time frame.
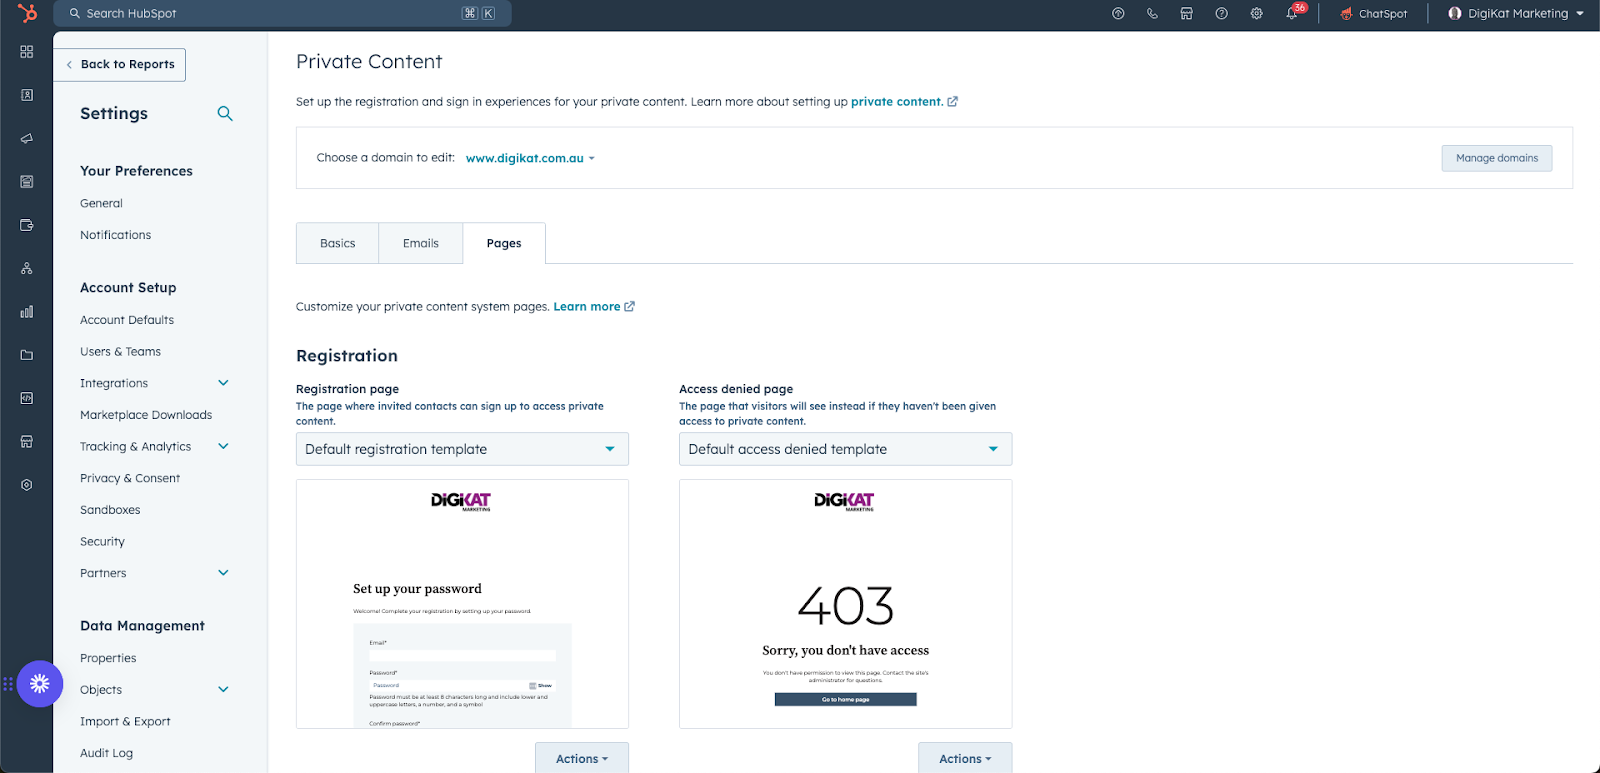
Pages
The next step is “Pages” where you can Customise your private content system pages.
System pages are part of any theme in the marketplace. If you have had a custom theme developed, your developer should have built system pages for you.
If you want a great membership theme, check out our theme, Nexus Portal.
Change your system pages to match your current theme is easy. Click the drop down for each page and select the theme you require

Once you selected the correct theme, remember to click save

System Pages
- Sign up: This page allows invited contacts to register and gain access to private content.
- Access Denied: This page provides a message to visitors who do not have access to private content.
- Sign-in: This page allows users to log in and access private content.
- Sign out: This page appears after users have successfully signed out.
- Password Reset: This page guides users through the password reset process.
- Create Password: This page allows users to create a new password when setting up their account or after resetting their password.
Destination Pages
At the bottom of the page, you will find the "Destination Pages" section. Here, you can customise the pages that visitors see by default after completing specific actions on your website.

This feature is useful for creating a more personalised experience for your visitors. By customising the destination pages, you can ensure that visitors are directed to the most relevant content after completing an action.
After Registration: Choose the page your users will be directed to after registration.
After Login: Select the page your users will land on after logging in.
After Logout: Specify the page your users will see after logging out.
To set the Destination Page simply click the dropdown, and select the HubSpot CMS page. Then click save.

Step 3: Setup your Membership List
The next step is to set up your Membership list. From the sidebar, click Content, then Memberships.
NOTE: Content Hub Pro only allows two access groups, so planning your membership area is essential.
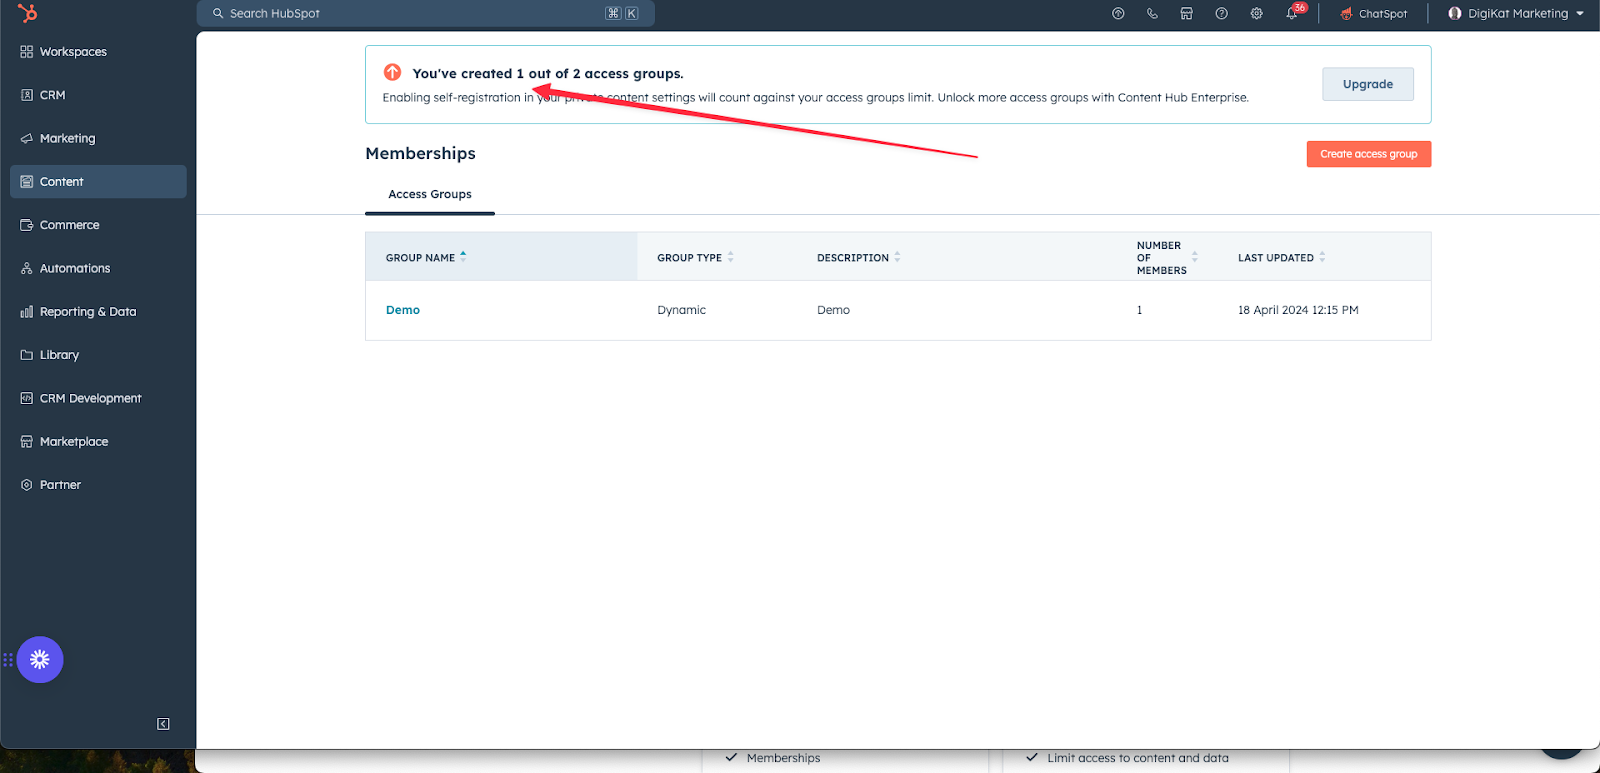
To set up your access groups, select Create Access Group.

Enter some basic information about your access group.
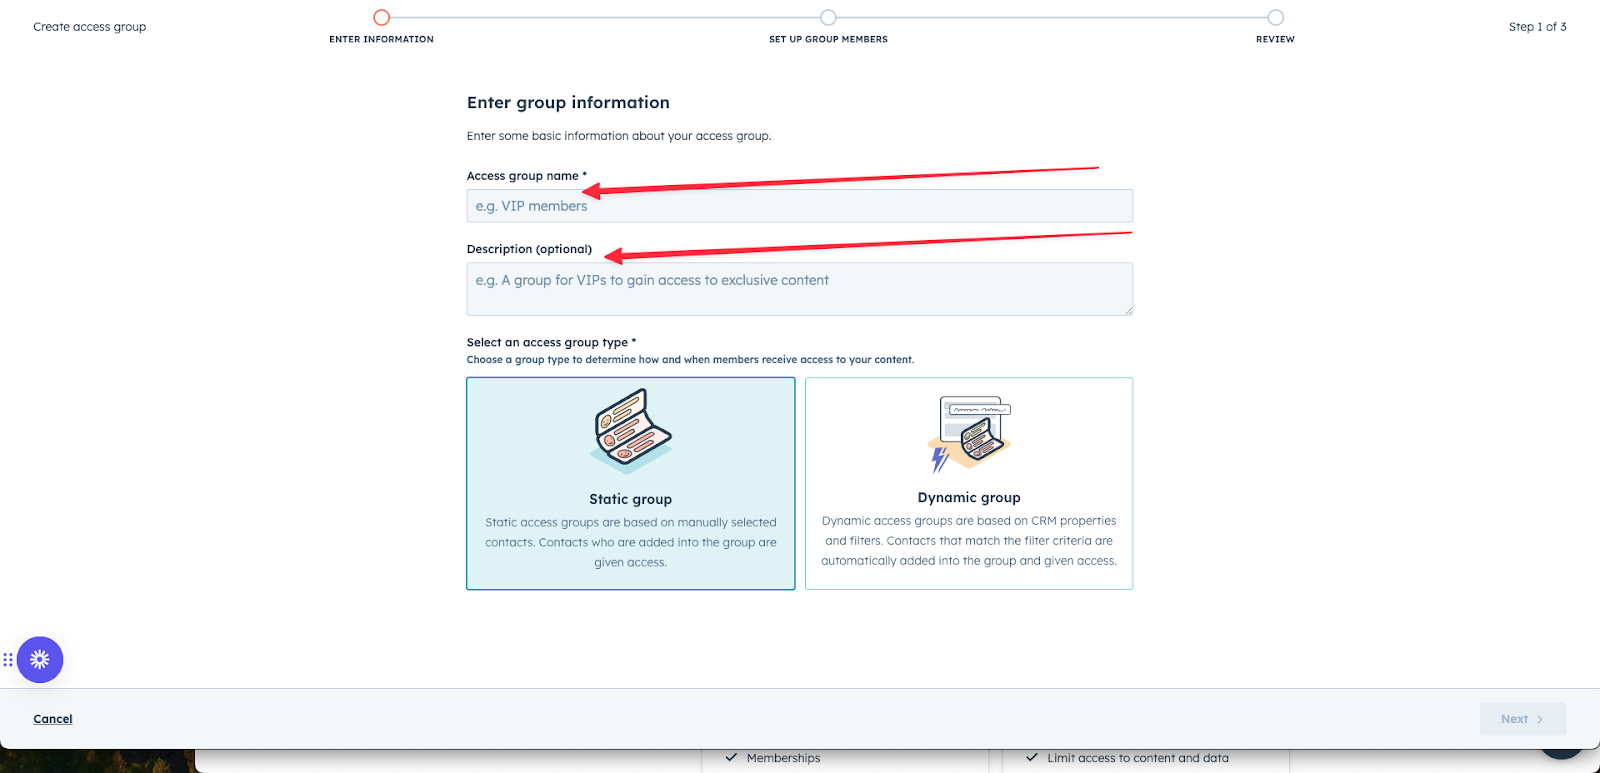
Consider how and when members should receive access to your content when choosing a group type.
Static Group:
- Contacts are manually selected and added to the group, granting them access to the content.
Dynamic Group:
- Access is based on HubSpot properties and/or filters.
- Contacts who meet the criteria are automatically added to the group and granted access to the content.
To organise memberships effectively, we suggest using a dynamic group. Create a property to align this group with relevant memberships, programs, or courses. You can then set the property using a form, workflow, or manual entry.

We set a property for “Membership," represented as a dropdown menu. This dropdown enables us to employ a workflow that automatically sets membership status based on various criteria, such as payment or subscription status.
Setting up memberships on HubSpot allows you to create exclusive, engaging content for your audience while ensuring a seamless and secure user experience. By following the steps outlined in this guide, you can effectively set up and manage memberships, personalize member interactions, and leverage advanced features for superior engagement.
If you need additional information or assistance with setting up your HubSpot memberships, please contact us. Our team at DigiKat is here to help you every step of the way.
From the blog